LLM Data Products
Our data ecosystems contain LLM (Large Language Model) data products that power Generative AI applications. The data’s origin, impact path, quality, and freshness are all critical to the success of these products. The democratized access to metadata and the ability to consume it quickly to make informed decisions can profoundly impact the performance of the models and outputs produced by GenAI applications. MeshLens makes integrating LLM data products into the Data Mesh view easy, providing deep insights into these products.
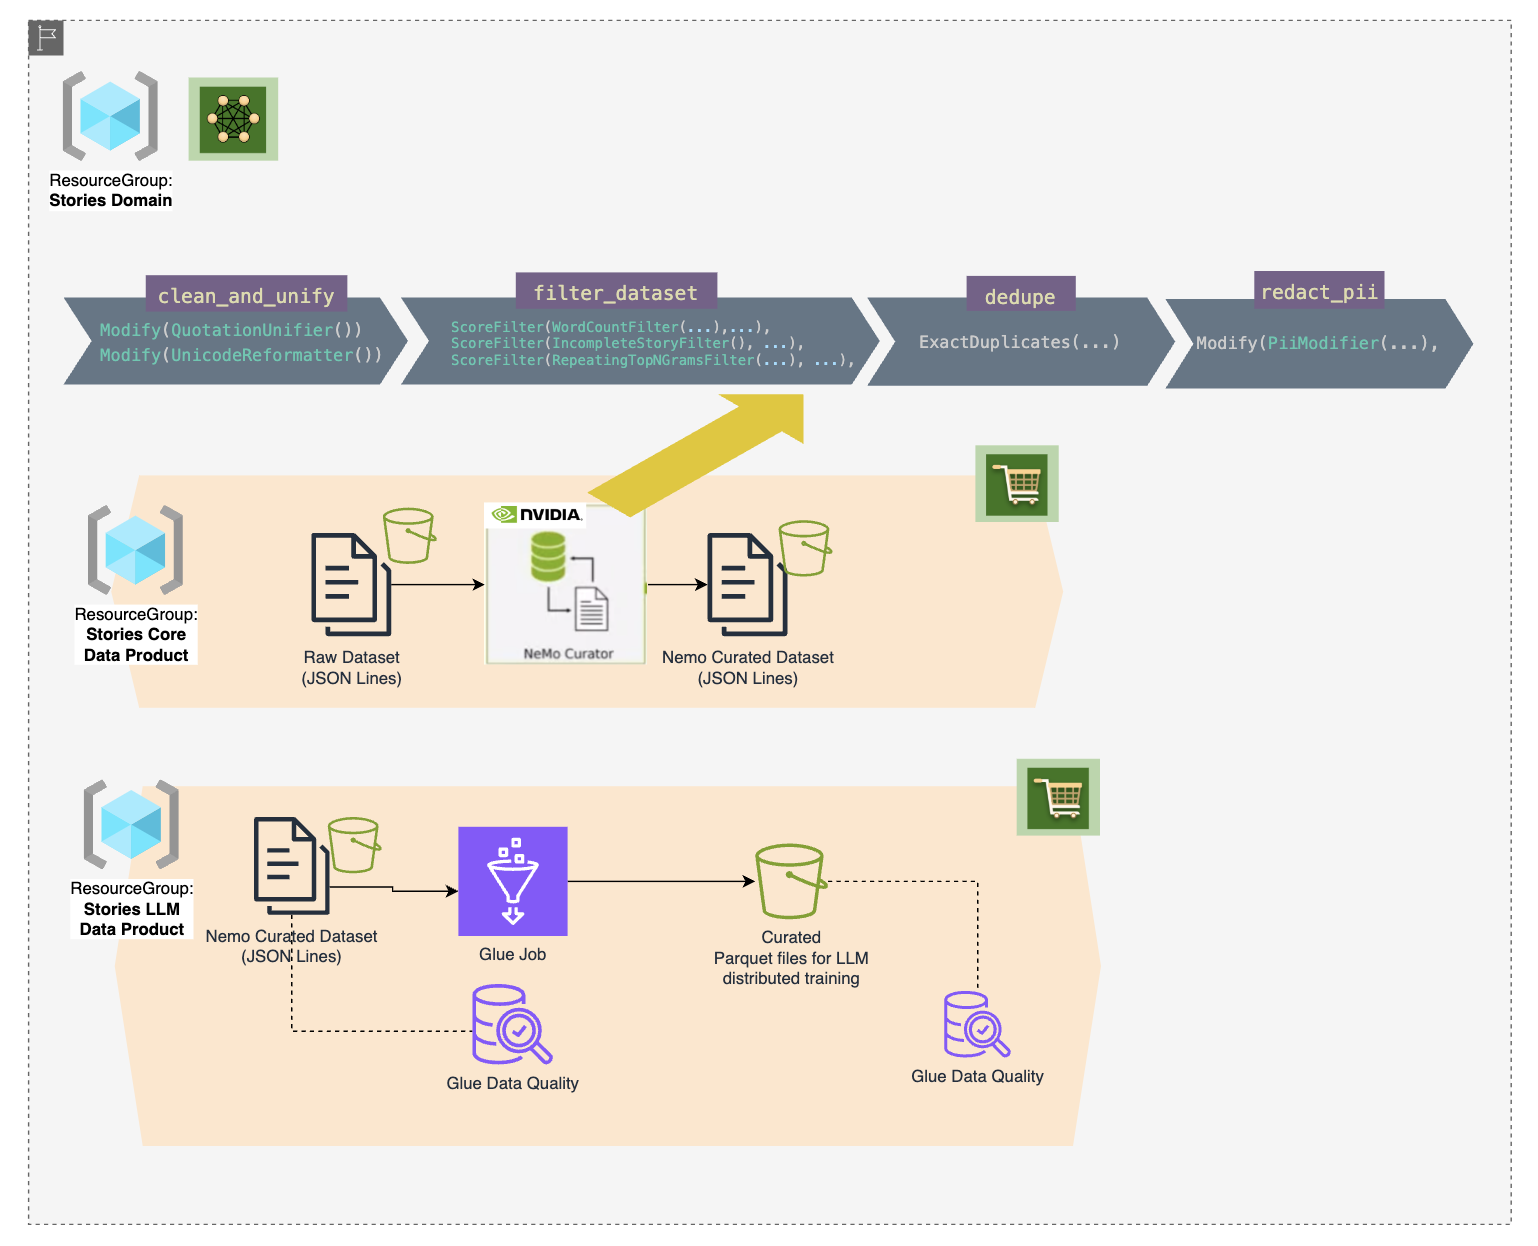
This tutorial is a practical guide to integrating LLM data products with MeshLens. We kick off with a reference product that leverages NVIDIA's Nemo Framework, specifically Nemo Curator, to cleanse and prepare raw text for LLM pre-training. We then use a Glue job to further process and emit the output for downstream consumers. Once we have our data assets and jobs ready, we delve into metadata augmentation to seamlessly integrate with MeshLens and view our catalog.
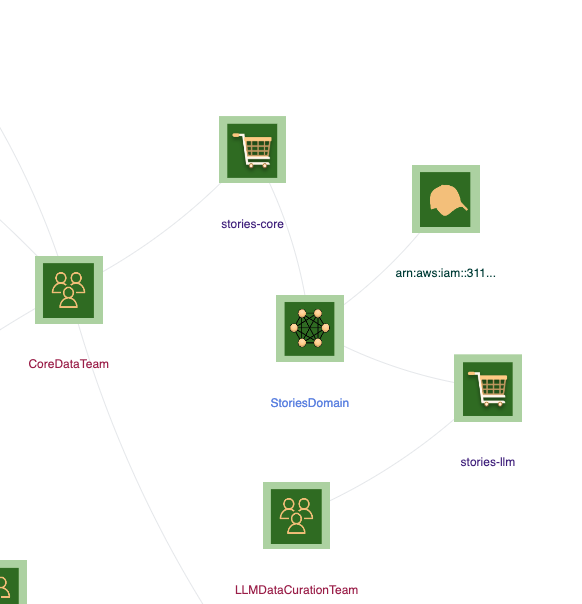
Here is a diagram of the reference LLM use case we start with and the Data Mesh entities, such as data products, domains, teams, and roles, that we view at the end of the tutorial:
LLM Use Case:
Note
This product is part of a larger domain; other data products are needed for a GenAI application. For this tutorial, we are limiting to the initial data products, and can be extended to others. We are also using a small dataset to illustrate the concepts. LLM pre-training is done with much larger corpus data, such as Common Crawl.
MeshLens View:
Prerequisites
Onboarding
Complete onboarding for the account and region you will be using.
Data preparation and curation pipeline with NEMO
We are using NEMO Curator to download our content, prepare input JSON lines and curate using filters and modifiers.
There are two options to complete this section. Choose based on the criteria below.
- If you are familiar with NEMO and has already environment to run stages, follow the steps outlined in the repo.
- If you want to run it locally follow the steps below.
Local curation pipeline run
- Clone the NEMO Curator repo.
- Launch docker container using the script below:
- Connect to docker container and run the script below to execute the curation pipeline:
Run the curation pipeline
set -x set -e python --version #Python 3.10.12 base_dir=`pwd` # Assumes base dir is top-level dir of repo ### ### setup nemo curator ### pip install --cache-dir $base_dir/downloads --extra-index-url https://pypi.nvidia.com . ### ### update LD_LIBRARY_PATH ### export LD_LIBRARY_PATH=$LD_LIBRARY_PATH:$(find /usr/ -name 'libcuda.so.*' | head -1 | xargs dirname) echo $LD_LIBRARY_PATH python tutorials/tinystories/main.py # might need to lower workers count, use --n-workers - Note results:
- Confirm local data files, it should look like this:
.
├── TinyStories-valid.txt
└── jsonl
    └── val
        ├── TinyStories-valid.txt-0.jsonl
        ├── TinyStories-valid.txt-1.jsonl
        ├── TinyStories-valid.txt-2.jsonl
        └── curated
            ├── TinyStories-valid.txt-0.jsonl
            ├── TinyStories-valid.txt-1.jsonl
            └── TinyStories-valid.txt-2.jsonl

4 directories, 7 files
Glue Data Catalog Preparation
Data upload to S3
Now that we have both raw and curated data assets as JSON lines, we can upload them to S3 for further processing. Use the script below to upload files.
set -x
set -e

base_dir=`pwd` # Assumes base dir is top-level dir of repo
S3_BUCKET_NAME=tutorial-llm-data-curation-${AWS_ACCOUNT_ID}
RAW_DESTINATION_FOLDER=s3://$S3_BUCKET_NAME/raw_stories
CURATED_DESTINATION_FOLDER=s3://$S3_BUCKET_NAME/curated_stories_nemo

SOURCE_FOLDER=${base_dir}/tutorials/tinystories/data/jsonl
RAW_SOURCE_FOLDER=${SOURCE_FOLDER}/val
CURATED_SOURCE_FOLDER=${SOURCE_FOLDER}/val/curated

###
### Ensure bucket
if aws s3api head-bucket --bucket "$S3_BUCKET_NAME" 2>/dev/null; then
  echo >&2 "Bucket $S3_BUCKET_NAME already exists. Skipping creation."
else
  # Create the S3 bucket
  aws s3 mb s3://"$S3_BUCKET_NAME" >&2
  echo >&2 "Bucket $S3_BUCKET_NAME created."
fi

###
### Upload raw and curated dataset
aws s3 cp $RAW_SOURCE_FOLDER $RAW_DESTINATION_FOLDER --recursive --exclude curated/*
aws s3 cp $CURATED_SOURCE_FOLDER $CURATED_DESTINATION_FOLDER --recursive
Glue Catalog Integration
Add Glue crawler for the following locations and run them to prepare the catalog with database stories and tables raw_stories and curated_stories_nemo.
- s3://tutorial-llm-data-curation-[AWS_ACCOUNT_ID]/raw_stories/
- s3://tutorial-llm-data-curation-[AWS_ACCOUNT_ID]/curated_stories_nemo/
Tip
If you need help setting up crawlers refer to the guide.
Glue Processing
-
Create a Glue job using Visual ETL to write results from
s3://tutorial-llm-data-curation-[AWS_ACCOUNT_ID]/curated_stories_nemo/tos3://tutorial-llm-data-curation-[AWS_ACCOUNT_ID]/curated_stories_llm/in Parquet format for final output dataset. -
Use
AWS Glue Data Catalogfor both source and target nodes. - In the target node, select
Create a table in the Data Catalog and on subsequent runs, update the schema and add new partitionsunderData Catalog Update options; set:- database
stories - table
curated_stories_llm
- database
Data Quality Rulesets
- Navigate to Glue → Tables → raw_stories → DataQuality
- Create a ruleset with the following definition to compare rowcount match with the curated dataset.
- Run the ruleset.
- Confirm evaluation from the logs.
- Navigate to Glue → Tables → curated_stories_llm → DataQuality.
- Add recommended rulesets.
- Run the ruleset.
Note
At this point, we have both input and output datasets integrated with the catalog and data quality results published for each.
MeshLens Metadata
Next, we will prepare the metadata for MeshLens integration. At the high level, this includes the following:
- Create mappings from datasets to crawlers to data products as outputs.
- Define input, output, and roles for datasets on input/output resources.
- Define data products and domains as resource groups.
Crawlers
In this section, we will annotate Crawlers for S3 datasets to associate them with data products.
- Navigate to AWS Glue console.
- For
raw_storiesandcurated_stories_nemotables understoriesdb:- Add Tags (
Key=Value)meshlens:data-product=stories-core
- Add Tags (
- For
curated_stories_llmtable understoriesdb- Add Tags (
Key=Value) meshlens:data-product=stories-llm
- Add Tags (
Input/Output Resources
- Navigate to AWS Glue Console → ETL jobs.
- Find the ETL job you created at data processing step.
- Go to Job Details → Advanced Properties → Tags.
- Add tags (
Key=Value)meshlens:data-product=stories-llmmeshlens:source:0=raw_storiesmeshlens:output:0=curated_stories_llm
Resource Groups
-
Create Stories Core Data Product
- Select Tag based resource group
- Resource types:
AWS::Glue::JobAWS::Glue::CrawlerAWS::StepFunctions::StateMachine
- Tag filters (
Key=Value)meshlens:data-product=stories-core
- Group Tags (
Key=Value)meshlens:domain=StoriesDomainmeshlens:team=CoreDataTeammeshlens:data-product=selfmeshlens:data-product:quality-threshold=8meshlens:data-product:shelf-life=7
- Name:
stories-core - Select Preview group resources, confirm.
-
Create Stories LLM Data Product
- Select Tag based resource group
- Resource types:
AWS::Glue::JobAWS::Glue::CrawlerAWS::StepFunctions::StateMachine
- Tag filters (
Key=Value)meshlens:data-product=stories-llm
- Group Tags (
Key=Value):meshlens:domain=StoriesDomainmeshlens:team=LLMDataCurationTeammeshlens:data-product=selfmeshlens:data-product:quality-threshold=8meshlens:data-product:shelf-life=7
- Name:
stories-llm - Select Preview group resources, confirm.
-
Create Stories Domain
- Select Tag based resource group
- Resource types:
AWS::ResourceGroups::Group
- Tag filters: (
Key=Value)meshlens:domain=StoriesDomain
- Group Tags (
Key=Value):meshlens:domain=self
- Name:
StoriesDomain - Select Preview group resources, confirm.
MeshLens Catalog
We can now see our integrated metadata displaying insights in MeshLens catalog.
Graph
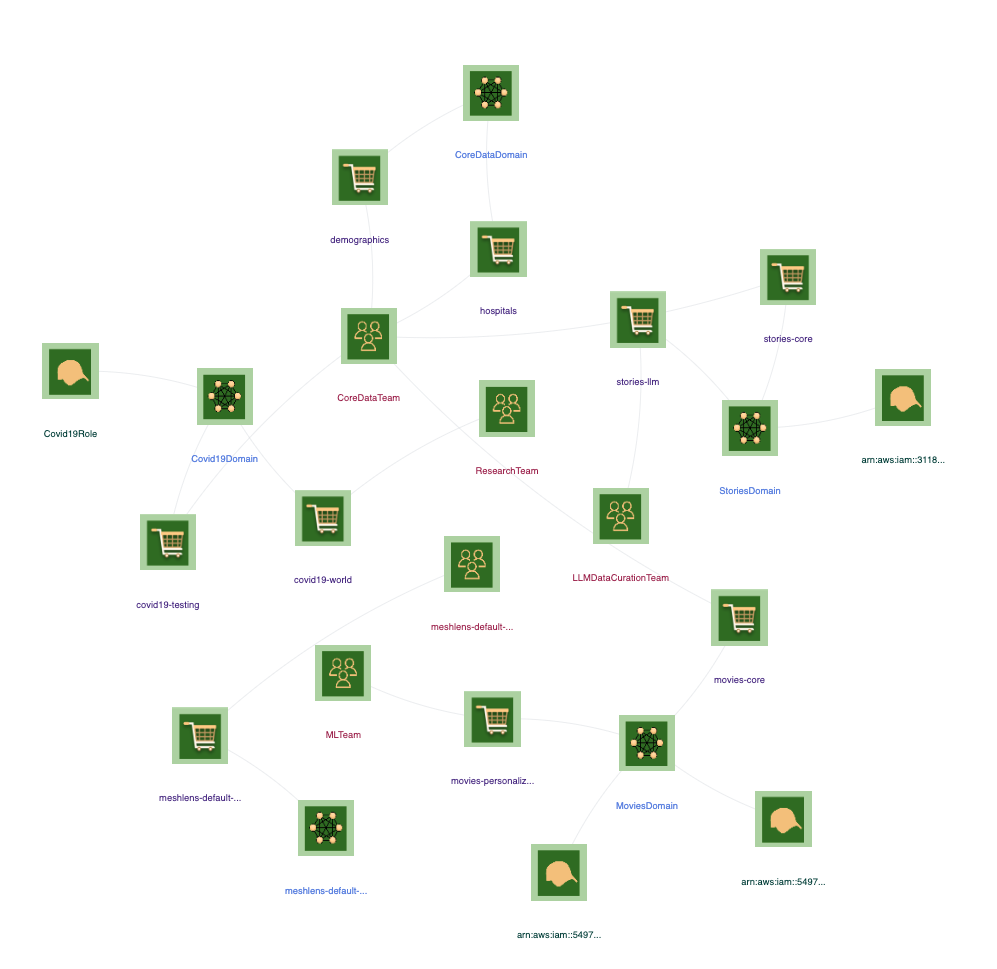
Navigate to /mesh and select Team and Role entities
Note
This view shows all domains and top level entities from resources including from other tutorials. You might see differently depending on your integrated resources.
Zoom into the Stories Domain.

Data Product Details
Click on the stories-llm data product or select it from the search box. The view will switch to showing “neighbors” of the data product.
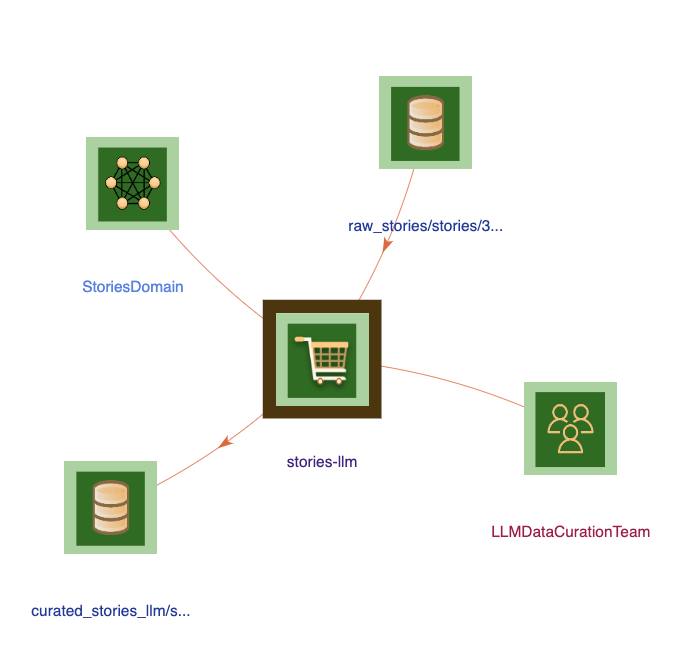
Select Inputs tab from details pane. To view the details of raw_stories dataset, select it from the list.
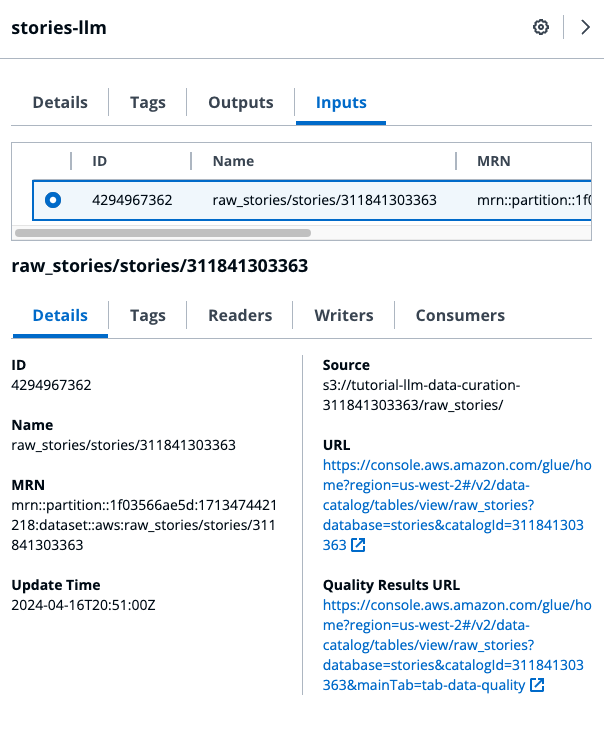
Click on the link under Quality Results URL to view the Data Quality tab in Glue.

👏 Congratulations, you completed the LLM Data Products tutorial of MeshLens!